
I’ve been having a blast painting Star Wars Legion miniatures this past month. This week I’ll be Painting my Star Wars Legion AT-RT Miniature. If you’ve read my previous post, Painting Miniatures for Beginners, you know I’ve been spending a lot of time trying different paints, techniques, brushes, and all of the other things involved in painting my growing collection of miniatures.
I learned a lot in my Reaper Miniatures Core Skills Painting Kit, however, I still consider myself a painting noob, and am slowly but surely honing my skills. I do play some D&D, and those miniatures were fun to paint and will be quite useable in future campaigns… but the Star Wars Legion miniatures are what really excited me to start this new hobby.
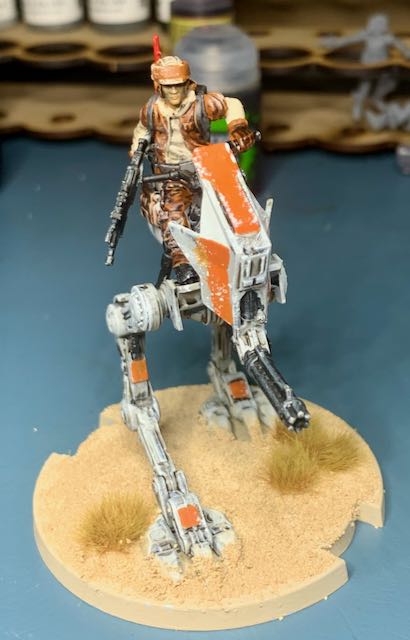
This week I’m going to focus on my first Star Wars Legion vehicle, the Rebel AT-RT
Star Wars Legion AT-RT
The AT-RT, All Terrain Reconnaissance Transport, aka, Rebel Scout Walker was a mechanical support walker originally used by Clone Troopers. AT-RT’s were also used by Imperial forces and of course, modified for use by the Rebel Alliance later on.
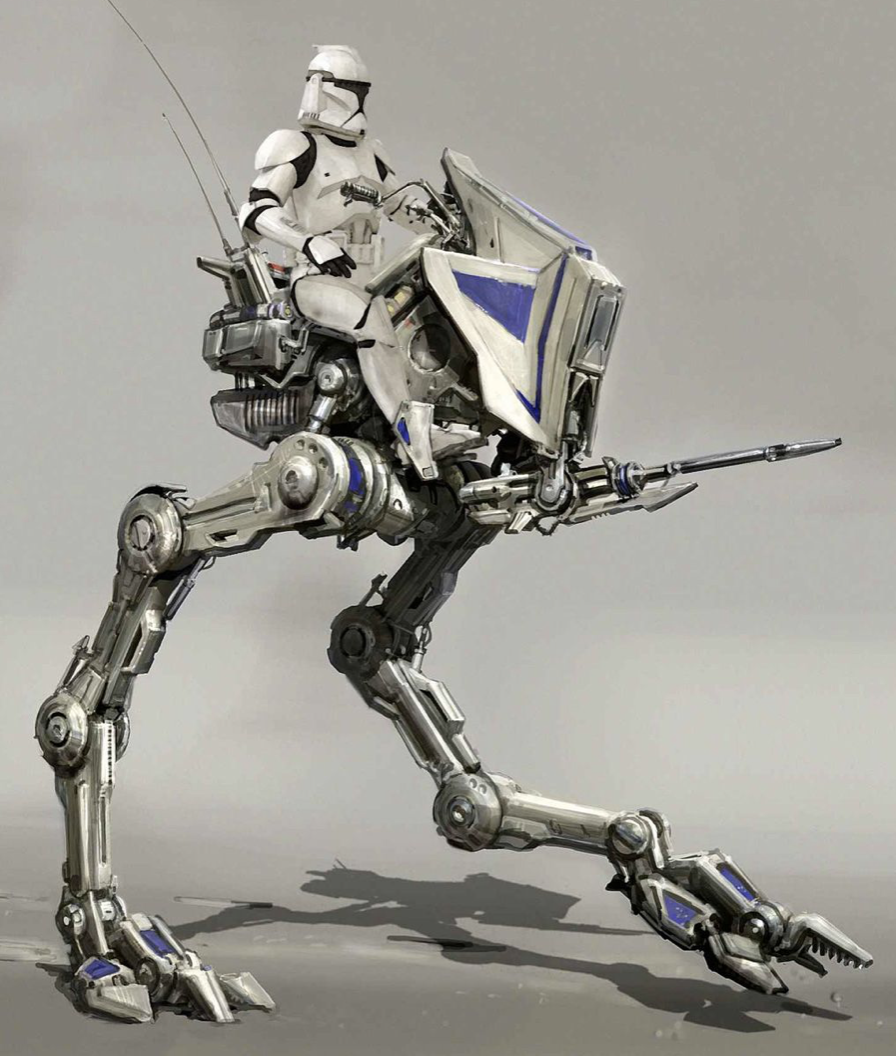
Republic era AT-RT
The Star Wars Legion core set includes 1 AT-RT along with a Rebel pilot and some upgrade cards. I’ve read on other painting blogs that vehicles can often be easier to paint compared to people or creature miniatures, but I was a bit intimidated by this one.
Painting the Star Wars Legion AT-RT Miniature
Painting & Priming
In the Star Wars Legion instruction guide, it does specify that all Star Wars Legion miniatures require priming before base coats, washes, and any other layering you decide to do. In my previous post I mentioned some Krylon primers I picked up at Lowes in matte white and gloss black (for my Storm Troopers and Death Troopers).
After some searching on Amazon and at my local Hobby Town store, I decided to try Citadel Colour’s Gray Seer. A bit on the pricey side, but well worth it! After one thin coat, the coverage was fantastic and the Citadel primer goes on so much smoother than the Krylon primers.
Since the Citadel Seer color was so close to the base coat I was going for, I decided to go straight for a darker wash in all of the nooks and crevices of my AT-RT before doing any highlighting or colors.
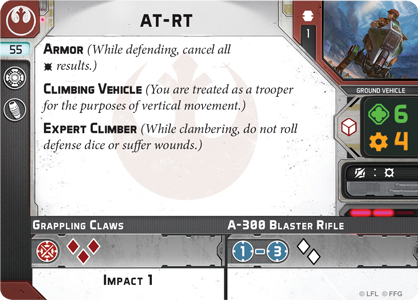
Star Wars Legion At-RT Card
Star Wars Legion AT-RT Miniature Washes
I used a combination of 2 different washes for my AT-RT:
My idea was, oily spots can be shiny, while some of the other dirt and debris caught in other parts of the vehicle, probably wouldn’t be. With this in mind, I used the Nuln Oil in those spots where I wanted a bit of oily sheen.
The Army Painter wash really worked out great for the rest of the AT-RT. A little bit goes a long way. I found using a #2 brush good for the bigger spots and a 3/0 finer tip brush for the tighter spots and line detail.
Of course, you can make your own dark washes with about a 4:1 ratio of water + black, but I found the Army Painter wash to be convenient and more consistent.
Dry Brushing the AT-RT
After my washes were dry, I went with Reaper Miniatures Dragon White for a dry brush layer. Dry brushing really brings out contrast and highlights which add depth to your miniatures. I wanted a bit of a weathered look, so I didn’t want to base coat the entire vehicle in white.
The Gray Seer color mixed with white dry brush highlights turned out pretty good I think. I used the Reaper #2 angled brush (the one included in the Core Skills kit). This brush has a wider profile on the side which is perfect for the dry brush technique.
AT-RT Base Coats
I added a Reaper Pure Black base coat to the under-mounted Rotary Cannon. The upgrade card for the AT-RT includes a close-up picture of the cannon with some red highlights. I think that would probably look cool with some paint schemes, but I decided on a more black metal look… and also because I thought the red with my orange might clash too much.
I also used the Pure Black on some of the hydraulics on the legs as well as the steering bars. I thought the black highlights in these areas would add a nice contrast to the white dry brush highlights. I painted the interior of the AT-RT in Reaper’s Mountain Stone, which is a nice darker gray color.
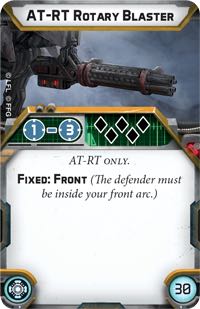
AT-RT Rotary Cannon
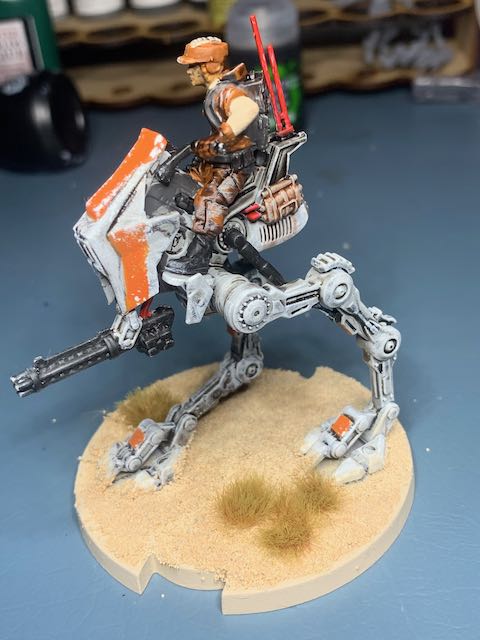
Lastly, I decided on Reaper’s Fireball Orange for my markings on the armored hood and legs. I’ve seen Clone Wars era AT-RT’s with a darker gray and green stripe color scheme (pic above). I thought the Orange looked better for my Rebel Troops AT-RT.
Highlights and Details
I went with Army Painter Soft Tone wash for the side packs. Honestly, I’m not sure if I’m happy with that. Black or a darker gray may be a better choice. I’m sitting with it for a few days before adding a varnish to give myself the option to change it.
I painted some of the exposed wires and tubing in Reaper Miniatures Heraldic Red. I also did a light wash of the soft tone wash to give the exhaust vents in the back a bit of dirty look. I was going for a smoky, dusty effect coming out of the vents.
I added a very light dry-brush of black to add a more battle-worn, dirty, weathered look. I did this more on the legs and toward the bottom, while doing a bit less on the upper section of the AT-RT.
The last dry brush step which I’m finding looks great on all black metal parts such as guns, etc., was a light Blade Steel to the edges. This gives it a more metal look and creates some natural shading against the black base coat.
Finally, I dipped a piece of sponge in Dragon White to add some chip and scrape effects to the orange sections and hull.
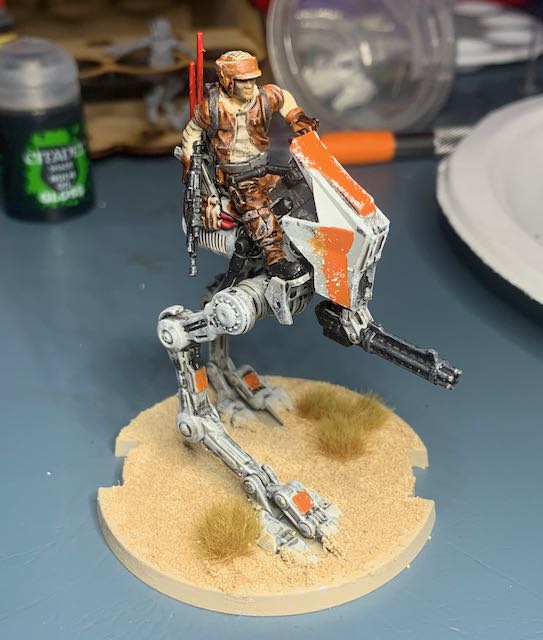
AT-RT Rebel Pilot Trooper
I made the NOOB mistake of gluing my trooper to the AT-RT before painting. Hey, I was excited to get my models together so I could play Star Wars Legion…. now I know better. It actually wasn’t as difficult as I thought it would be to paint around him.
I think if you base coat the vehicle around the seat and underneath the Rebel pilot, you’ll find as I did, getting his legs and torso done while mounted wasn’t so bad.
Chances are, you’re going to come up with your own color scheme based on your own diorama or game squad motif. I’m going with more of a desert look ala Tatooine, so I went with browns and tans for my Rebel pilot.
- Legs, Jacket, and Gloves: Reaper Leather Brown
- Shirt, sleeves, and hat: Reaper Desert Sand
- Straps, Backpack and belt: Reaper Mountain Stone
- Face: Reaper Caucasian Flesh
- Boots: Pure Black
I added a wash of the Army Painter Dark Tone to the legs and jacket, with a soft tone to the undershirt, face, and helmet. You can be the judge of whether I may have overdid this last step. 🙂
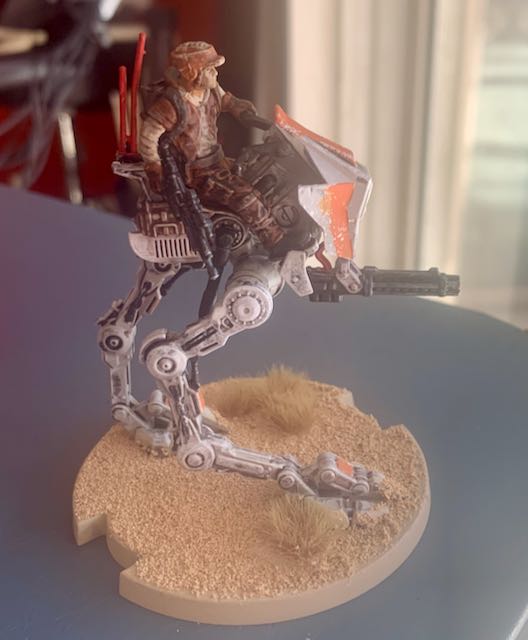
Basing Your AT-RT Miniature
As with my previous post, I went with the Tatooine motif of Reaper’s Desert Sand as a base coat. A new trick I learned, was how to get the little ballast rocks to stay in a place a bit better.
After my base coat was dry, I used an old brush to apply a light mixture of Elmer’s Glue and water over the surface of the base. A quick dip in my sand stones and my base was nearly complete.
I used a drop of super-glue to add some of my Army Painter Mountain Tufts to complete the look I was going for.
You may find when basing your Star Wars Legion miniatures that the aiming arc markers (for vehicles) are covered up with paint or other basing materials. If you flip your base over, you can see where the markers are on the underside.
Using the underside markers as a guide, I decided to paint my own front and rear facing markers on the side vertical face of the base. This provides game functionality without sacrificing the desired look of your bases. I’ll probably redo these later, but for playing purposes, they’ll work just fine.
Varnishing the AT-RT Miniature
I went with an Army Painter Matt Varnish. This rattle can vanish is “anti-shine” and easy to apply. You’ll wanna do this outside or in the garage if possible. I followed the instructions and applied two light coats.
I’ve had a blast painting my Rebel AT-RT! I’ve seen so many awesome paint schemes around the internet. If you have one you’d like to be featured, shoot me an email with some pics and your color, techniques, tools, etc., and I’ll update this article with your work added.
Craig Smith is a professional Guitarist, Teacher, and Writer living in Sanford, Florida. Craig has taught guitar lessons, performed 200+ gigs per year for nearly 30 years, and published 4 guitar instructional books. When he’s not gigging, gaming, or writing, you may find him by the pool with his wife Celeste, 4 Chihuahuas, and a drink.