2020 was a weird year for hobbies; both new and rediscovered. Painting miniatures may have saved some of my sanity from the past year. Losing essentially all of my live performance guitar gigs at the end of March was quite a blow to my income and also my ego.
I jumped in full-force in April completing my Classical Guitar – A Practical Guide Vol. 1 book in April and May. After publishing and promoting the book in June, I jumped right back in by finishing my 4th book by mid-August. I felt like I was using my time off in the best way possible…. but I wasn’t really having much fun.
Painting Miniatures – Dungeons & Dragons
One of the best ideas I’ve had in a while was getting a D&D game going via Zoom. I have a few like-minded friends with whom home-quarantine was also taking it’s toll. We had a campaign going a few years ago and decided this was a great opportunity to start one up again.
Getting back into the vibe, especially the 5E Player’s Handbook and character creation was a blast. It brought me back to the days of my youth at around age 12, when I created my very first Dungeons & Dragons character from the old 80’s boxed set. Ed. Note: (I plan to write more about D&D as our campaign progresses in an upcoming article.)
Targeted advertising really is a thing. I noticed my Facebook and Instagram feeds suddenly filling up with ads for RPGs, related books, other table top games, and…. miniatures. Ahhh, scaled miniatures suitable for play (or display).

My 3 monitor D&D game setup.
I had used miniatures in D&D games, usually supplied by someone else, but I had never tried to paint them myself. Where do I even start? I had no idea what size miniatures to buy or what kind of paints to use. Would I need to invest tons of money into brushes and other tools and equipment? It seemed a bit daunting, but what the hell, I had the time and the desire.
Getting Started Painting Miniatures
My wife Celeste says I have too many hobbies, (while quietly being supportive of them). The Summer and Fall of COVID-19 afforded us more free time to hang out together around the house and play some board games, something that we both enjoy.
With the idea of painting miniatures in the back of mind, I purchased Gatefall from Amazon. Gatefall is a very well reviewed board game with elements of RPGs and other strategy games in an attractive table-top format. Aside from the glowing reviews, I was drawn to the highly detailed, gorgeous, unpainted miniatures included in the core set.
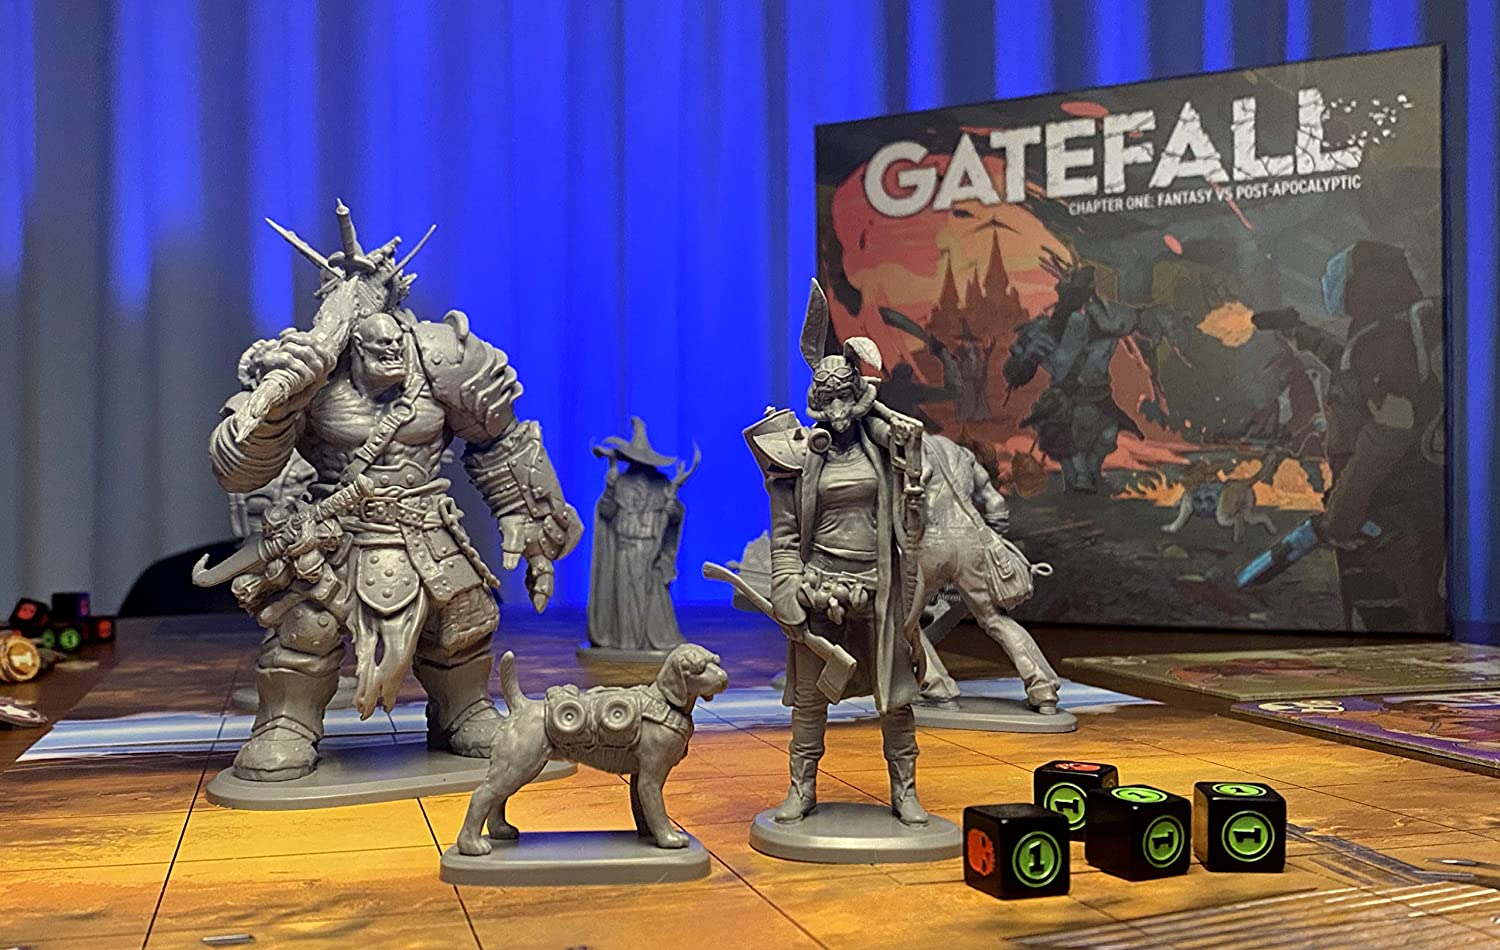
Gatefall’s epic unpainted miniatures.
This was my way into the world of painting miniatures. Gatefall is a game my wife and I both enjoy along with a side-quest of sorts to eventually getting around to painting those amazing miniatures! I was surprised at how much Celeste liked Gatefall, but I knew I could do better. As the holidays approached I added a few things to my Christmas list including the Star Wars Legion core set.
Celeste and I are both huge Star Wars fans and I figured a Star Wars board game would be yet another fun time-killer during our COVID nights at home. She had received the excellent Jaws table-top game for her birthday in August, so we were on a gaming roll and I was confident Star Wars Legion would be a great 3rd game to add to our roster.
What Miniatures to Paint First?
The Star Wars Legion core set includes a ton of unpainted miniatures including Darth Vader, Luke Skywalker, and a few infantry sets of Rebel Troops and Imperial Stormtroopers. It also includes some Imperial Speeder Bikes and an awesome Rebel AT-RT vehicle. Ok, now I’m starting to get intimidated!
At this point, I really have my work cut out for me. I still haven’t bought any paint, brushes, or other tools. My other internal dilemma is, do I want to use the fairly expensive GateFall or Star Wars Legion miniatures as a testing ground for trying my new miniature painting hobby?
- What if I suck at painting?
- What if I ruin these beautiful (and expensive) miniatures?
- What if it’s too hard, or even worse, not much fun?
Assembling Miniatures
The miniatures included in the Star Wars legion set require some assembly. Nothing too jarring; just some arms, heads, the occasional leg, gun, or helmet glued onto the included base platform.
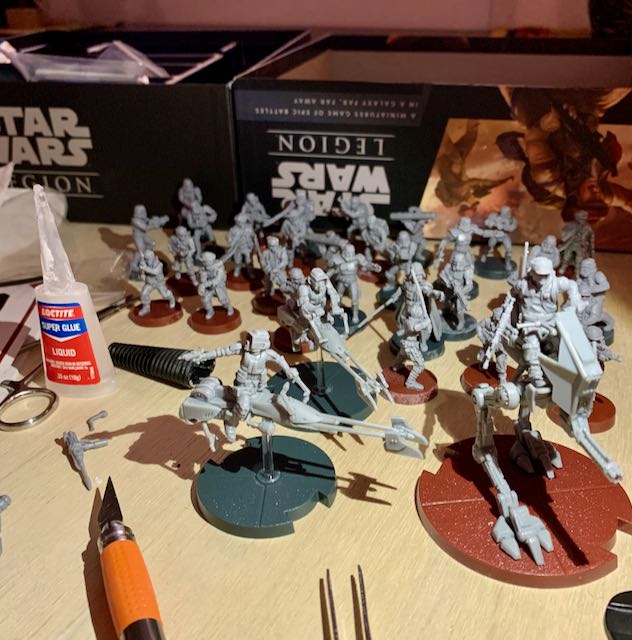
Star Wars Legion Miniatures
As kid and young adult, I loved putting together models. I was a bit intimidated by the work ahead of me, but I have to admit it was fun. All I needed for this task was a nice hobby knife and some super-glue. I suppose you could use other plastic-friendly model glues, however, the instructions included with Star Wars Legion specified super-glue, so that’s what I used.
With my new hobby knife, I gently scored away the mold lines from the miniatures. In most cases it was minimal and sometimes not necessary at all. With miniatures of this size (1/47 scale), not much glue is needed. Just a dab of glue and hold for about 30 seconds and you’re fine.
Once your Rebel or Imperial armies are glued to their bases, you’re ready to play.
To Paint or not to Paint
You don’t need to paint your miniatures to play the games. I did a few skirmishes on a 3×3 playing field and had a great time learning the complex rules (think Warhammer 40k style).

Star Wars Legion
The same could be said for Gatefall which includes much larger miniatures that honestly, still look great without paint. A quick google search for painting miniatures, and specifically, ‘Painting Star Wars Legion miniatures’, was all the inspiration I needed to get started.
What to buy: Tools and Paints
The most intimidating part of getting into miniature painting for me was; what should I buy first? I didn’t want to buy the wrong paint or brushes. There’s so much stuff out there, it can be a little overwhelming for a beginner. I did some research and found a few of the ‘heavy hitters’ in the miniature painting world:
- Reaper Miniatures
These guys seem to do it all. They sell high quality paints, miniatures, brushes, and lots of helpful extras. They are U.S. based and are very reasonably priced. - Citadel Colour
Based in the U.K., Citadel is the official partner of Warhammer 40,000 miniatures and Games Workshop stuff. Very good quality but a bit on the pricey side. - Army Painter
This is the paint used and branded for official Dungeons & Dragons merch and miniatures. They also sell some other cool extras like foliage, rocks, and other things to make your work really pop.
A guy at my local Hobby Town shop also mentioned that Vallejo is another great brand for paints.
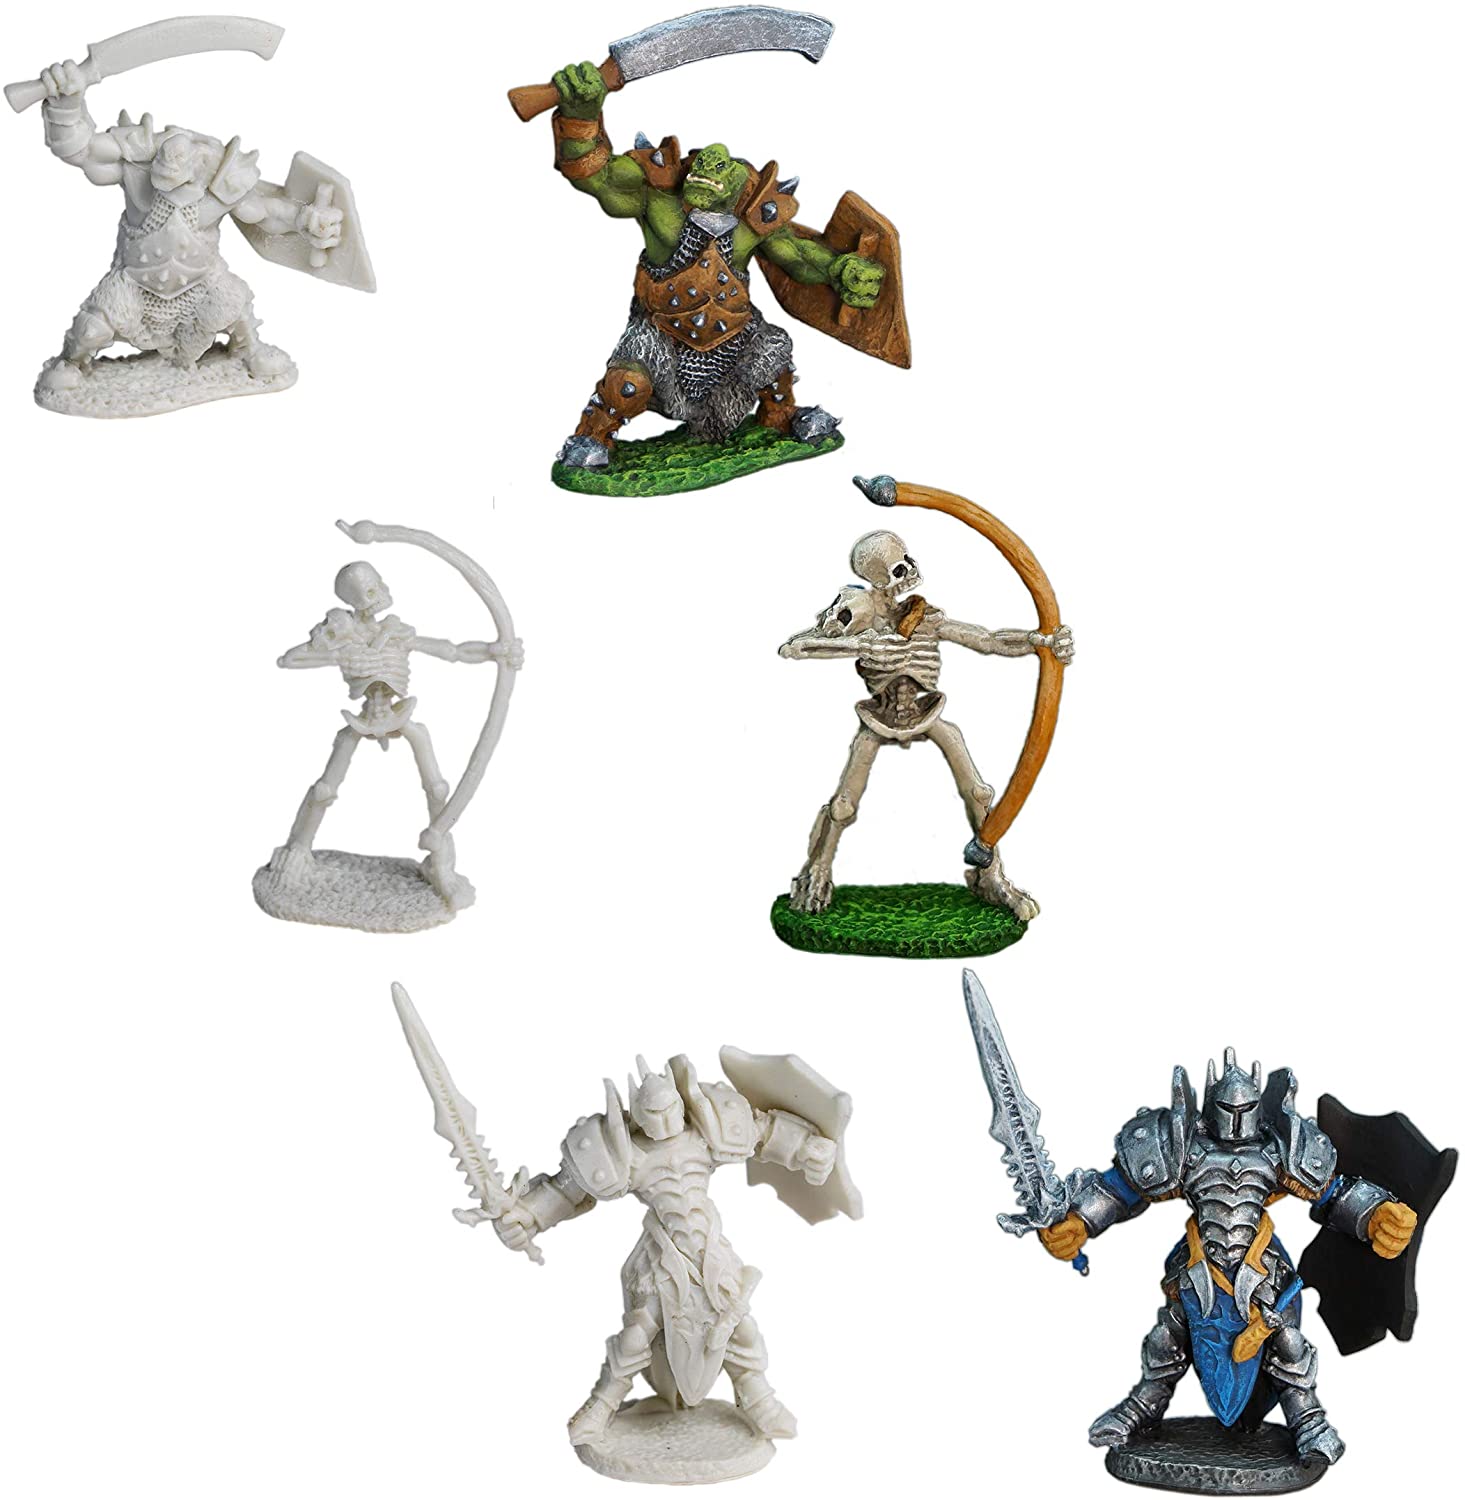
Miniatures included in the Reaper Core Kit.
Reaper Miniatures Learn to Paint Kit
Problem solved! After much searching around on Amazon, I came across an inexpensive solution to scratch my new hobby itch; a complete kit!
The Reaper Miniatures Learn to Paint Kit hit all the marks for me. It includes:
- 3 high quality miniatures.
- 2 different brushes. (#2, #0)
- 11 paints.
- Instruction booklet.
- Carrying case for paints and minis.
The handy case can also be used to store finished miniatures in its convenient 25 foam slots. At around $30 on Amazon, I figured it was a gamble worth taking. I was right…
Getting Started Painting Your First Miniature
The included booklet covers Reaper’s core painting skills including base coats, washes, and drybrushing. If you’re a complete beginner like me, these terms are all new to you.
I decided to stick with the instructions and started with the first ‘easy’ miniature, the Skeleton Archer. After a quick bone colored base coat (which is as straight-forward as it sounds), I moved into the wash phase.
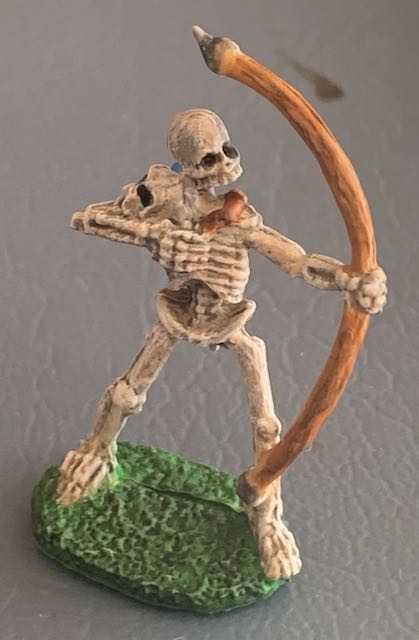
My first painted miniature…. it could have been worse.
Basecoat and Wash
In miniature painting, a ‘Wash’ is a watered down mix of paint and water that is loosely applied to fill in the grooves, cracks, and textures of your miniatures. After your base coat is a dry, apply a darker color ‘wash’ approximately 1 part paint and 4 parts water. This wash is what gives the depth and shadow in the bones of the Skeleton Archer (above pic).
Some paint manufacturers such as Citadel, sell a ready-made wash. The Reaper paints included in this kit have a handy dropper bottle style, so it wasn’t too hard to just drop a 4:1 water/paint mixture onto my palette.
Speaking of palettes, you don’t need anything fancy here. I painted my first 10 miniatures with a Chinet paper plate and some parchment paper as my palette. Keep an old coffee mug filled with water nearby and you’re ready to go.

Dry Brushing
At first I didn’t get the washing step. It seems like a watery mess on my little guy until I got to the next step: Dry Brushing. Drybrushing involves getting just a little paint on a flat or wider brush, then wiping off the excess on a paper towel or whatever you have handy. When there is barely any paint left on the brush, gently swipe it over raised areas to accent edges and sharpen up your miniature’s features.
I was pretty impressed with my results after just these first 3 steps. You can even add a brighter color dry brush highlight as an optional 4th step.
Finishing Touches
Once your various base coats and washes are finished, you can get into the detailed areas of your miniature. I found painting my way ‘out’ to work best for me, meaning, start on the deepest areas and paint the furthest most raised areas last.
The included #0 fine detailing brush worked great for the quiver, arrows, eyes, and other tiny details. If you want to experiment with more brush sizes, I also found a nice set of fine detail paint brushes for $9.99 on Amazon.
Once you’re satisfied with all of the finer details, you can go ahead and paint the base and add an optional wash or ground color.
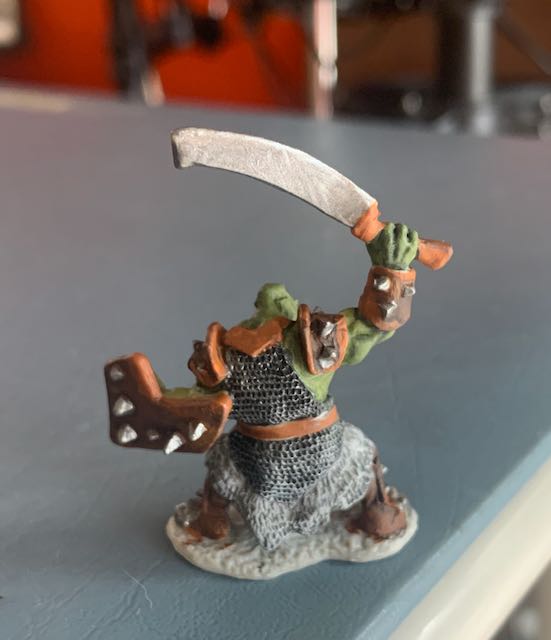
The Reaper Core Kit escalates quickly into more complex miniatures including this Orc Marauder (above), which was a ton of fun to paint. The 3rd tutorial and miniature, Mangu Timir, looks like he would be a badass Paladin class on the D&D RPG table.
My Orc Marauder required a bit more finesse and detail than the Skeleton Archer. What I learned in the first tutorial carried over and made it it much less difficult overall. Interesting to note is that the skin color of the Orc is not included in the kit. The second tutorial covers some paint mixing techniques which turned out really cool. That’s how I got that Hulk-ish skin color.
I primed Mangu in a Krylon matte white (below). These Reaper miniatures don’t need priming, but I wanted to give it a try before getting into my more expensive Star Wars Legion stuff.

To Prime or not to Prime
Some articles and tutorials I’ve read around the internet are conflicting when it comes to priming miniatures. Some miniature painters prime everything while some only prime when the miniature material requires it (as in the Star Wars Legion miniatures).
A prime coat is a base coat surface that helps acrylic paints adhere better to some types of plastic, resin, or metal. You can buy paint-on primers or spray type. I grabbed some matte white and glossy black (for my Death Troopers) spray cans and feel pretty good about the results.
On the flip side to that argument, I did not prime my Orc Marauder and he turned out pretty awesome, sooooo…. ultimately its up to you of you want to add this extra step.
Priming Your Miniatures
Priming with spray cans can be messy business if you’re not careful. After watching a few videos, I came up with a simple method that keeps everything well contained and efficient.
Since I wanted to prime a full squad of 5 Death Troopers at once, I decided to poster tack them onto a piece of wood in a horizontal row. I used an old box as a barrier to catch any over spray. You’ll want to do this in a well ventilated area, preferably outdoors, as the fumes from the primer can be fairly strong.
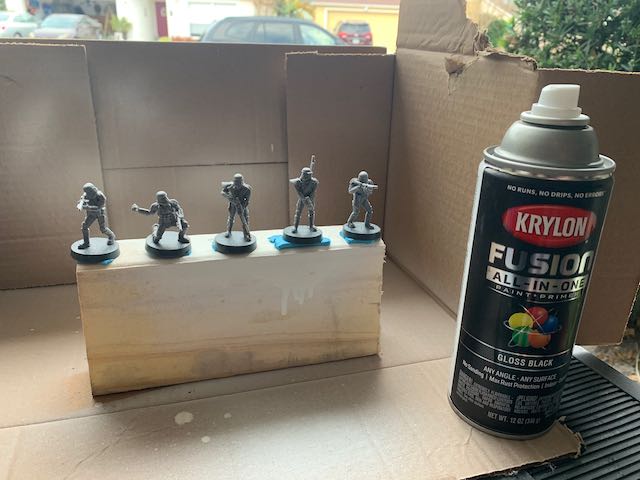
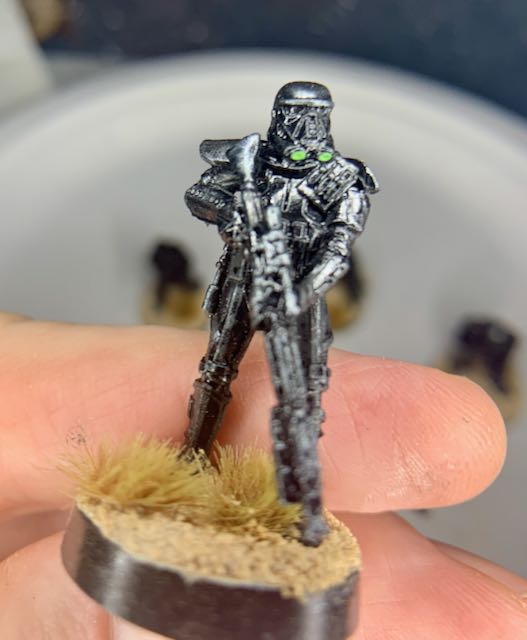
For my Death Troopers, I used Krylon Fusion All-in-one paint + primer in gloss black. I figured the gloss black would be nice to give the trooper’s armor a bit of shine, and I was right! After a good clean coat of the primer, I added a dry brush layer of Reaper Blade Steel. As with my Reaper Miniatures Core Painting kit, the drybrushing really makes those edges pop and gives the miniature a more ‘metal’ look.

As you can see below, I experimented with different levels of dry brushing on these guys. Some I left more glossy and some dulled a bit more with the blade steel color dry brush. I then mixed a ratio 1:1 of Reaper’s Naga Green and Candlelight Yellow to get the green lights on the helmet of each Death Trooper.
Painting Miniatures with Bases
I painted the top of each base in Reaper’s Desert Sand color (also included in my core kit). It took 2 base coats to get good coverage over the textured Star Wars Legion bases. I decided to leave the bottom vertical wall of the bases gloss black from the priming step.
On my squad leader I went with the Desert Sand color all the way down. I think both styles look pretty good, but I’m leaning toward the Desert Sand for more of a Tatooine or Mos Eisley battlefield look.
I got lucky at Hobby Town with some Army Painter brand ‘mountain tufts’ and stones that perfectly represent the Desert Sand color and Tatooine surface I was looking for. I’m still experimenting with different adhesion methods, but I found that the wet base paint along with a few drops of super glue is sufficient in holding the stones in place.
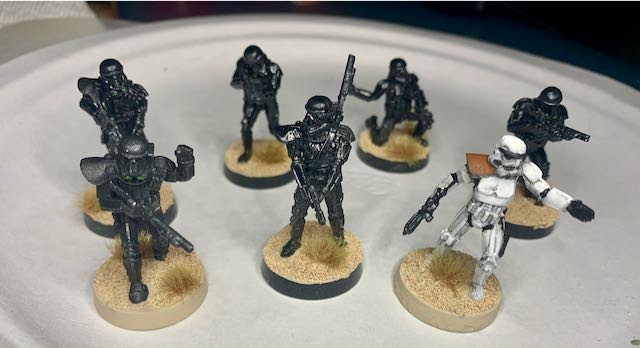
Notice the trooper on the bottom-left was painted using matte and not gloss primer. I like them both.
I’ve seen other people use a mix of Elmer’s glue and water, which sounds like a great idea. I’ll try it in a future tutorial and report the results.
Painting StormTrooper Miniatures
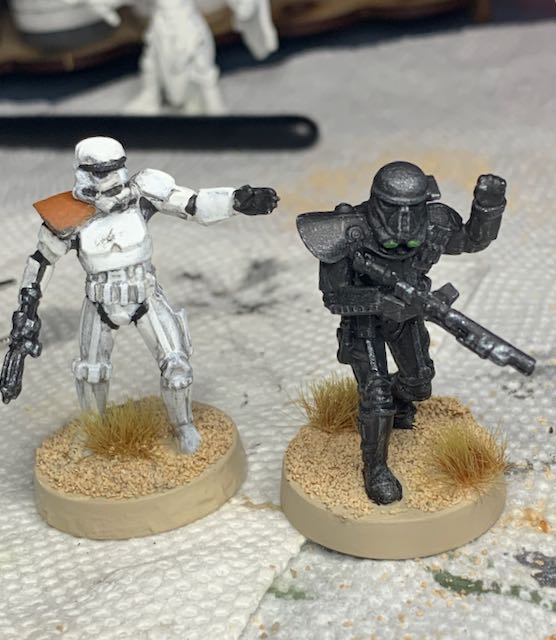
I had a helluva time doing this guy! I started with a white matte Krylon primer. The primer alone seems to be a little runnier than the paint + primer I used for the Death Troopers. After the priming step, I went over the miniature in Reaper’s Dragon White.
I then created a wash of 4:1 drops of water mixed with Pure Black. I wanted my Storm Trooper to look a little weathered having seen some action in battle. The wash helped bring out the recessed edges and provide a bit of a dirtier look.
I’ve seen other tutorials from guys like Sorastro do ‘clean’ troopers in white and a fine detailed edge line of black or grey along the raised edges. Experiment and see what you prefer.
The black sections of the Storm Trooper were also done in Reaper Pure Black. This was the hard part for me. Even with my tiniest 10/0 brush I had a hard time around the helmet and holster areas.
I went over the whole thing in 2 more dry brushing steps:
- A watered down Pure Black to add some battle dirt.
- A top layer of Dragon White to bring our those raised edges one last time.
Lastly I painted my squad leader’s pauldron in Reaper Paint’s Harvest Brown.
I’m hoping the remaining StromTroopers come out a bit better. When I finish the other squads, I’ll update this article with new pics.
With the dry brushing, I think this guy turned out great.
Varnishing Miniatures
The final step in miniature painting is the varnish; a protective clear layer of matte or gloss that protects the paint from chips and scratches.
The general consensus among miniature painters is to varnish those miniatures which will be handled often or used in games. For display purposes it’s not really necessary. I haven’t varnished mine yet, but I think I will use a brush-on varnish for the Star Wars Legion minis just to preserve my hard work during play.
Spray on varnishes are also available in gloss and matte (or ‘Matt’). My over-eagerness to complete my bases with foliage and stones prevented me from using spray varnish. A good idea would be to spray your miniatures before completing the bases. Oops. 🙂
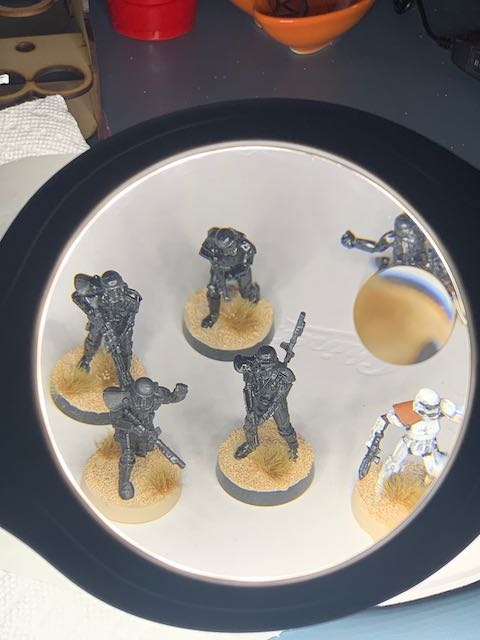
Looking through my awesome LED lamp.
Equipment Used and Shopping List
Two items (I wish I knew) I needed when I started: An LED magnifying lamp (above) and a miniature holder. The lamp was my wife’s idea, and she nailed it. Most of these standard miniatures are small. The close lighting and magnification of my lamp really made the process easier.
My first 2 minis were painted by mounting some poster tack into a screw-driver handle, then mounting the miniature on the tack. It worked, but who knew that Citadel makes a better one?
The perfect size for holding in your off-hand along with an adjustable width clamp for securing yours miniatures during painting.
The Complete Miniature Painting Shopping List:
- Reaper Core Painting Kit
- Extra Brushes
- Citadel Miniature Handle
- Krylon Primers and Sprays
- Varnish
- Magnifying light
- Army Painter Foliage Tufts
Stuff from Around the House
- Paper Plate – To hold your palette.
- Parchment or Wax Paper – Palette.
- Coffee Cup – To rinse brushes between colors.
- Sponge – It’s a sponge!
- Q-tips – To fix those screw-ups fast when paint is still wet.
- Paper Towels
- Glue
- Poster Tack
- Tweezers – For applying foliage, rocks, sticks, etc., to your bases.
Craig Smith is a professional Guitarist, Teacher, and Writer living in Sanford, Florida. Craig has taught guitar lessons, performed 200+ gigs per year for nearly 30 years, and published 4 guitar instructional books. When he’s not gigging, gaming, or writing, you may find him by the pool with his wife Celeste, 4 Chihuahuas, and a drink.